
Recycle Box Creative Block Solutions
Recycle Box Creative Block Solutions

Are you a creative? Whether you work with paper, paint, fabric, or mixed media, we all face similar roadblocks—feeling unmotivated, stuck, or overwhelmed by too many choices, too much clutter, or even our own creations piling up. The urge to shop or scroll for something new is strong, but often the best solution is to return to what we already have, know, and enjoy. By reconnecting with familiar tools and materials, you may be surprised at how quickly inspiration returns. In just one focused session, you might come away with new ideas, a fresh start, or at the very least, a lighter load.
Start simple. Your junk box is the perfect place to begin. Whether it’s a bin of recyclable paper, unused scraps, or unfinished pieces you didn’t quite know what to do with, this “creative clutter” holds potential without pressure. New supplies can feel overwhelming, so avoid them for now. Instead, use what feels disposable. If it doesn’t work out, no harm done—you can toss it and move on. This limitation encourages you to think more creatively. Chances are, you already have a few items within one basic category to work with.
Narrow your focus by choosing a couple of distinct categories. “What’s on my desk” is too broad and chaotic. Pick something specific—today, for example, you might use masterboards, postcards, or other leftover pieces you can repurpose with die cuts. Even if you don’t have die-cutting tools or don’t consider yourself a paper crafter, you can adapt this method to suit your own style.
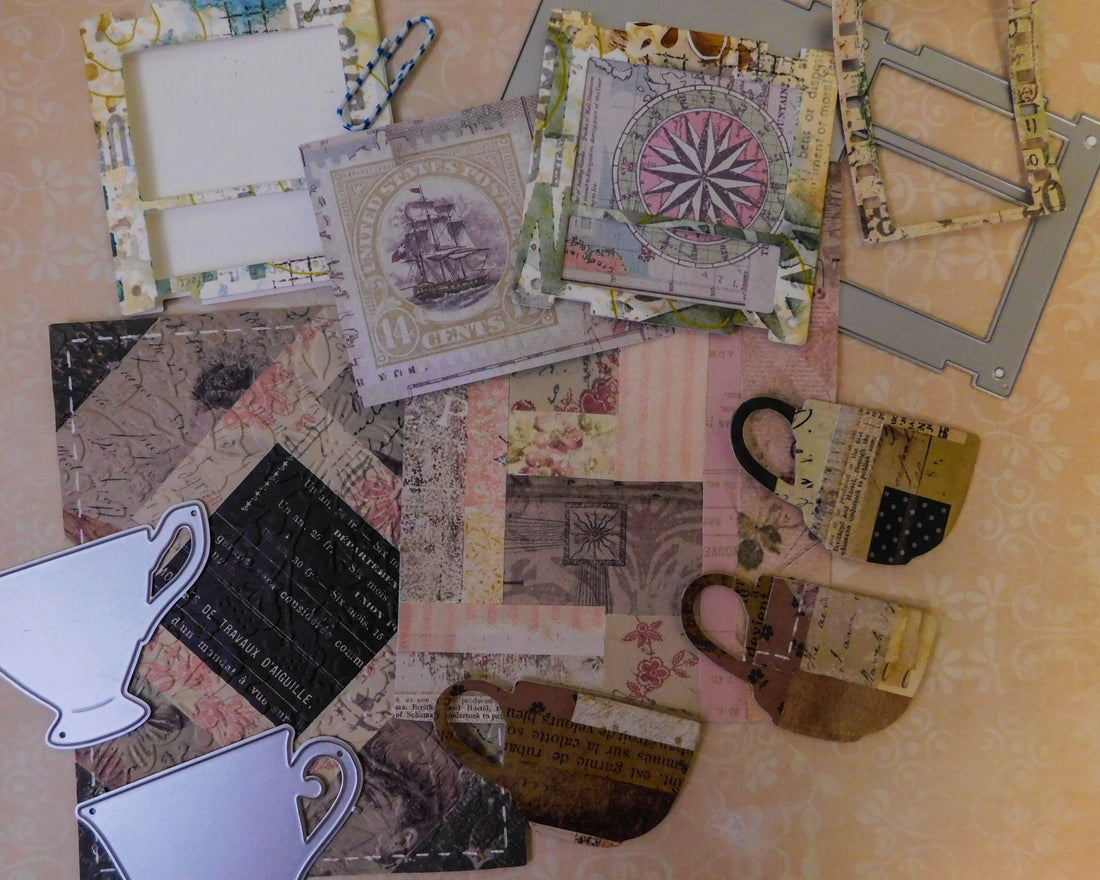
Now, select a simple tool or technique. For this session, I’m using die cuts. They’re easy to use and produce polished results regardless of skill level. By the end, you’ll have a small collection of starting pieces—ready to embellish later or use as-is. Choose die shapes that you already love or that spark new ideas. Pick a few sizes and styles to keep things versatile. Maybe you like leaves, birds, or flowers. I’ve chosen cups, slides, buttons, and envelopes. Cups and slides are especially flexible because they can match any motif or material. Envelopes and buttons are always practical. Even the leftover scraps can become buttons or other small shapes—use a simple circle punch to get the most out of your paper.
Start cutting as many shapes as you can from your chosen material, without worrying about decorating or finishing them. You don’t need to use all of them today—this is just about limiting your options enough to spark creativity without overwhelming yourself.
Once you've worked through your main category, explore a new material using the same tool. Don’t bring in anything new—stick to what you already have. Try unwanted photos, magazines, tissue boxes, packaging, old cards, or book pages. Let your chosen die cuts guide which materials will work best. This is your third category.
Cut some shapes from this new material, then take a break. Let your mind wander—mix, match, imagine. You might find yourself following a brand-new direction. Jot down a few ideas for later, or keep going if inspiration strikes. If a new spark appears, go back to your die cut stash and try another shape.
Now go through everything you’ve created. If something doesn’t work or you really dislike it, toss it immediately. If you’re unsure, store it in an idea book—but chances are, you still won’t love it later. Instead, try placing some of your new pieces where they might be used. Remember, it’s just paper—earth-friendly and replaceable. Editing and committing a few pieces to an actual project can be a great learning experience.
Gather your finished items and store them somewhere visible and accessible, so they’re not forgotten. Revisit your stash from time to time and clear out anything that no longer fits your current taste or creative direction. Do the same with your materials and tools. As your style evolves, this exercise helps you keep what matters and let go of what doesn’t.
Keep designated spaces for each type of material, tool, or finished piece—and honor those boundaries. If you find yourself needing more room, that category is probably overstuffed. Return to step one and pare down using what you’ve learned.
As for finished creations—if you love them, give them a home. Display them in another room or create a decorative collection. Don’t let them gather dust in a forgotten box. If it still feels overwhelming, consider donating or selling. Creators create—and clutter follows. Be mindful of your space.
In the end, you’ll leave your creative session feeling lighter, refreshed, and inspired. Take a well-earned break and let the ideas settle. At the very least, you now have a set of saved favorites and a handful of techniques to carry forward into future projects.
Happy paper crafting!